Hello Ningbo Huiho Cosmetics Packaging Co., Ltd. - China Mascara Tubes Packaging Manufacturers


In most cases, yes. A broken Lip Gloss Tube can be repaired at home depending on the type and extent of the damage. Cracked wand applicators, loose or detached caps, leaking seals, and stuck or broken doe-foot wands are all fixable with basic household tools and a few minutes of careful work. The only scenario where repair is genuinely not practical is a tube body that has cracked completely through under pressure, causing the formula to leak from the structural wall of the tube itself. In all other common damage scenarios, a working repair is achievable without special equipment.
Beyond home repair, understanding why lip gloss tubes break in the first place helps prevent repeat damage and informs better storage and handling habits. This guide covers every common failure mode, the correct repair approach for each, and practical guidance on when a tube is worth repairing versus when transferring the formula to a new container is the smarter solution.
Content
Before attempting any repair, correctly identifying the specific type of damage saves time and prevents making the problem worse. Lip gloss tube failures fall into five main categories, each with distinct causes and repair approaches.
The wand, particularly the thin connection point between the cap and the doe-foot or brush tip, is the most structurally vulnerable component of a lip gloss tube. Wands snap most commonly when the tube is dropped onto a hard surface, when excessive twisting force is applied while trying to loosen a stuck cap, or when the tube is stored in a bag where heavy objects press against the wand from above. Acrylic and polystyrene wands are particularly prone to clean snaps, while more flexible polyethylene wands tend to bend before breaking.
The cap of a lip gloss tube relies on a friction fit or thread engagement with the tube body to create an airtight seal. Caps become loose after repeated opening cycles wear down the contact surfaces, after accidental dropping that deforms the cap rim, or after heat exposure that causes slight dimensional changes in the plastic. A loose cap allows air into the tube, which accelerates formula oxidation and drying, making this a repair worth prioritizing quickly.
In tubes where the wand is sealed into the cap with a gasket or compression fit, aging of the gasket material or physical distortion of the seal area can allow formula to seep upward around the wand shaft and pool inside the cap. This is frequently misidentified as the tube being overfilled when it is actually a seal failure.
Dried formula residue is the most common cause of a cap that will not open. Lip gloss formula that migrates into the thread or friction zone of the cap and dries forms an adhesive bond that can require significant force to break. Forcing a seized cap without proper technique almost always results in wand breakage or cap cracking.
Soft plastic tube bodies, commonly used in squeeze-style lip gloss packaging, can be dented or permanently deformed by sharp impacts or by being stored under heavy objects. While a dented tube body does not always affect function, severe deformation can prevent the cap from seating correctly or cause formula to be pushed out around the seal under pressure.
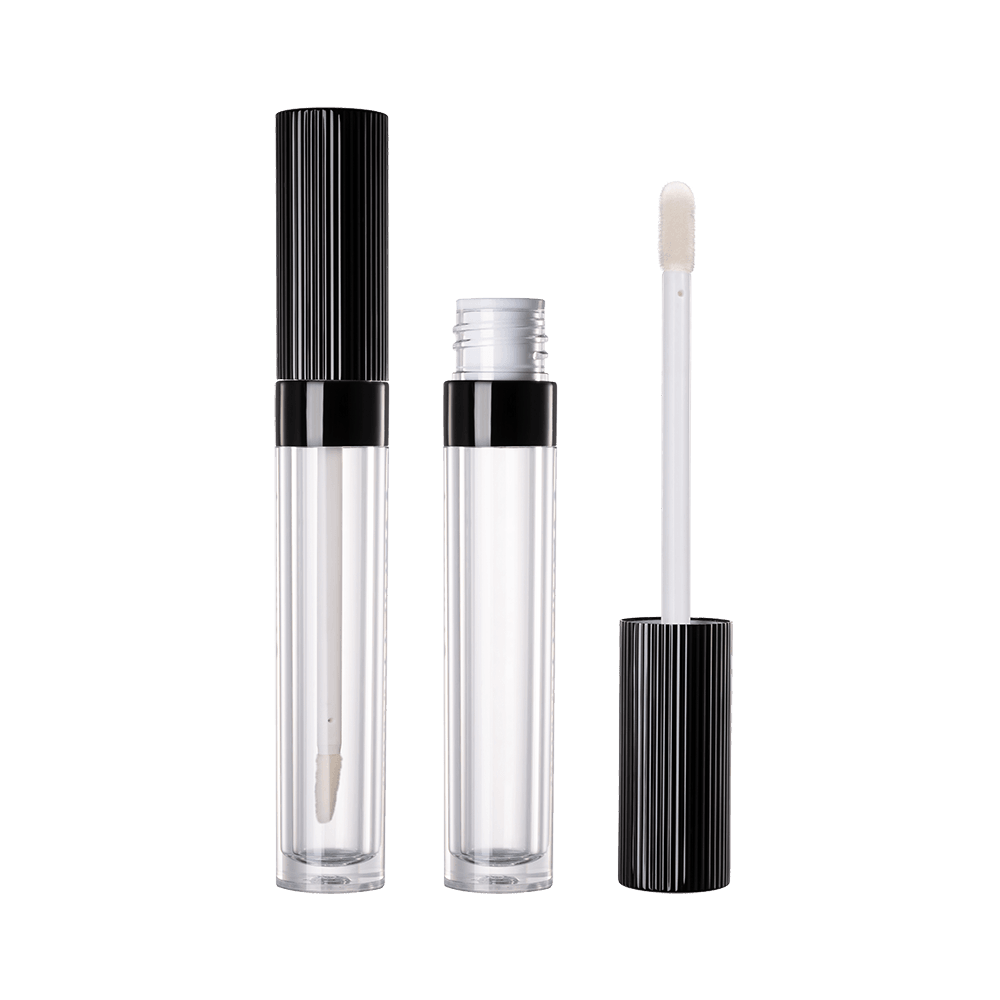
Having the right materials ready before beginning a repair prevents interruptions and reduces the risk of making damage worse. Most of these items are already available in a standard household:
| Item | Purpose | Availability |
| Warm water (not hot) | Softening dried formula residue, loosening seized caps | Standard household |
| Cotton swabs | Cleaning formula from threads, applying adhesive precisely | Standard household |
| Isopropyl alcohol (70 percent or higher) | Dissolving dried formula, cleaning surfaces before repair | Pharmacy |
| Clear nail adhesive or super glue (cyanoacrylate) | Bonding cracked plastic, re-securing loose caps | Pharmacy or craft store |
| Clear silicone sealant | Re-sealing gasket areas, filling hairline cracks in plastic | Hardware store |
| Rubber grip pad or jar opener | Gripping stuck caps without damaging the tube body | Standard household |
| Small empty cosmetic pot or jar | Formula transfer if tube is beyond repair | Beauty supply store |
| Toothpick | Applying adhesive to small or recessed areas | Standard household |
One important caution before using any adhesive near a lip gloss tube: only cyanoacrylate or cosmetic-grade adhesives should be used on any area that may come into contact with the formula. Industrial solvents and adhesives not rated for cosmetic proximity should never be used on lip gloss packaging, as chemical migration into the formula is a genuine risk with incompatible materials.
A broken wand is one of the most disheartening lip gloss failures because the damage is usually sudden and the wand seems irreplaceable. In practice, there are two viable responses depending on where the break occurred.
If the wand has snapped cleanly at the middle of the shaft with both pieces intact, reattachment is possible using cyanoacrylate adhesive. The repair process is as follows:
A repaired wand shaft will be slightly more brittle at the repair point than the original material. Handle the cap with particular care during the first few uses after repair.
When the wand snaps at the point where it connects to the inside of the cap, reattachment is more challenging because this area is typically recessed and difficult to access cleanly. In this case, transferring the formula is often the more practical solution. Use a clean cosmetic spatula or toothpick to transfer the formula from the tube into a small empty cosmetic pot, where it can be applied with a clean lip brush until a replacement tube is available.
A wand that has been bent but not broken can sometimes be straightened by immersing it in warm (not hot) water for 30 to 60 seconds to soften the plastic, then gently straightening it by hand and holding the corrected position while it cools. This works best on polyethylene wands. Acrylic wands that have been bent will typically snap if straightening is attempted, as they do not have sufficient flexibility for this method.
A cap that no longer stays on securely is both a usability problem and a formula preservation issue. Air exposure accelerates oxidation in lip gloss formulas, causing color shift, texture change, and fragrance degradation. According to the Personal Care Products Council's stability testing guidelines (PCPC, 2018), repeated air exposure can reduce the effective shelf life of an opened lip gloss by 30 to 50 percent compared to a properly sealed tube stored under the same conditions.
Friction-fit caps rely on close contact between the inner wall of the cap and the outer wall of the tube neck. When this contact becomes loose due to wear, a thin wrap of clear self-adhesive tape around the tube neck before capping can restore the friction fit temporarily. For a more durable solution, applying a very thin bead of clear silicone sealant around the inner rim of the cap, then placing the cap on the tube and removing it immediately before the sealant sets, deposits a thin layer of flexible material that increases the contact friction without permanently bonding the cap in place. Allow the silicone to cure for 24 hours before use.
Stripped threads on a screw-cap lip gloss tube are difficult to repair permanently. As a practical interim measure, the same clear silicone sealant approach described above can restore enough sealing contact to protect the formula from air exposure. However, a tube with genuinely stripped threads is usually best addressed by transferring the formula to a replacement container.
Some lip gloss tube designs use a hinged cap rather than a fully removable cap. If the hinge pin has broken, the cap can be re-secured using a drop of cyanoacrylate at the hinge connection point. Apply adhesive only to the hinge, not to the cap sealing face, and ensure the cap is held in the correct alignment during curing. Test the seal carefully after 24 hours before relying on the repaired hinge for normal use.
A cap that refuses to open is one of the most frustrating lip gloss problems, and the most common response, applying more twisting force, is also the most likely to cause additional damage. The correct approach uses heat and moisture to dissolve the dried formula bond before any rotational force is applied.
After successfully opening a seized cap, clean the thread or friction zone thoroughly with an alcohol swab before re-capping. Residue left in place will simply re-dry and cause the same problem again. Wiping the cap interior clean after every use is the single most effective prevention measure against cap seizure.
Formula leaking from around the wand shaft inside the cap typically indicates a failed internal gasket or a distorted seal surface. This is one of the messier failures but is often repairable without losing the remaining formula.
Before applying any sealant, clean out the cap interior completely with cotton swabs and isopropyl alcohol and allow to dry. Then reassemble the tube without the formula inside if possible, or hold it horizontally for 10 minutes and observe exactly where formula accumulates inside the cap. Knowing whether the leak originates at the gasket ring, the wand shaft, or the cap body wall determines the correct repair approach.
If the internal gasket has compressed, torn, or shrunk, a thin bead of cosmetic-grade clear silicone applied to the gasket seat and allowed to cure for 24 hours before reassembly can restore the seal. Apply silicone with a toothpick for precision and use only enough to fill the gap, as excess silicone can obstruct the wand movement or change the cap fit.
If formula is leaking specifically along the wand shaft rather than at the gasket, a thin wrap of plumber's PTFE tape (Teflon tape) around the base of the wand shaft where it passes through the cap creates a compression seal that can stop the leak. PTFE is chemically inert and is safe in proximity to cosmetic formulas. Use one to two wraps maximum to avoid creating excessive resistance when inserting and removing the wand.
Soft plastic tube bodies made from LDPE or HDPE can sometimes be reshaped after denting if the deformation is not permanent. The key factor is whether the plastic has creased (a sharp fold line) or simply been pressed inward (a shallow dent without a crease line). Creased plastic has been permanently deformed and cannot be meaningfully repaired. Shallow dents, however, can often be reversed.
Fill the tube with warm (not boiling) water through the open cap end, cap the tube securely, and allow the internal warmth and slight pressure to push the dent outward from inside. For more stubborn shallow dents, a heat gun or hair dryer set to low heat applied briefly to the dented area (keeping the tool at least 15cm from the tube surface) softens the plastic enough to allow it to return toward its original shape. Always allow the tube to cool completely and check the cap seal before returning the tube to normal use after any heat application.
If a dent in the tube neck area prevents the cap from seating flush and creating a proper seal, the most reliable fix is to transfer the formula into a replacement container rather than attempting to reshape plastic in a structurally critical zone. A cap that does not seal correctly will accelerate formula degradation regardless of how well other repairs are made.
Not every broken lip gloss tube is worth the time and effort of repair. The decision to repair versus transfer should be made based on the severity of damage, the value of the formula, and the practical difficulty of the repair.
| Damage Type | Repair Feasibility | Recommended Action |
| Cracked wand midpoint, both pieces intact | High | Repair with cyanoacrylate |
| Wand snapped at cap connection point | Low | Transfer formula to cosmetic pot |
| Loose friction-fit cap | High | Repair with silicone layer or tape |
| Stripped screw threads on cap | Low | Transfer to replacement tube |
| Seized cap from dried formula | High | Warm water and alcohol release |
| Leaking internal gasket | Medium | Repair with silicone or PTFE tape |
| Hairline crack in tube body | Medium | Seal with clear silicone sealant |
| Full crack through tube body wall | None | Transfer formula immediately |
| Shallow dent in tube body | Medium | Heat reshaping |
| Creased or split tube neck | None | Transfer to replacement tube |
When transferring formula, use a clean cosmetic spatula or the undamaged portion of the original wand to move the formula into a small empty cosmetic pot or a new lip gloss tube. Label the container with the product name and transfer date, and note that the formula's remaining shelf life should be calculated from the original opening date, not the transfer date.
Prevention is considerably less effort than repair. The following practices significantly reduce the frequency of all the damage types covered in this guide:
Not all lip gloss tubes fail equally. Understanding the relationship between tube construction and durability helps in making better purchasing decisions and informs more targeted repair approaches when damage does occur.
Lip gloss tubes are most commonly made from three plastic types: PETG (polyethylene terephthalate glycol), PP (polypropylene), and acrylic. PETG offers the best combination of impact resistance and clarity, making it the most durable common tube body material. PP has excellent chemical resistance and is the most commonly used material for the cap and wand components. Acrylic provides superior clarity and premium aesthetics but is notably more brittle and significantly more vulnerable to cracking from drops than PETG or PP equivalents.
The doe-foot applicator made from soft flocked foam or silicone is more durable than a flat paddle or brush applicator of equivalent length, because its material has sufficient flexibility to absorb minor impacts without cracking. Wands with a thicker shaft diameter are considerably more resistant to snapping than slim-shaft designs, with shaft diameter being the single strongest predictor of wand break resistance in drop-testing (source: Packaging Digest, Cosmetic Applicator Durability Study, 2020).
Tubes using an internal gasket seal in addition to a friction or thread fit are more resistant to leaking and cap loosening than tubes relying on friction fit alone. The gasket provides a secondary seal that compensates for minor dimensional changes caused by temperature variation and wear, maintaining sealing performance over a longer service life.
For cosmetic brands, formulators, and retailers evaluating lip gloss packaging options, the Lip Gloss Tube range at nb-huihe.com offers a comprehensive selection of tube constructions in PETG, PP, and acrylic body options, with varying wand shaft diameters, applicator tip styles, and cap seal configurations to match both aesthetic requirements and the durability priorities of different product categories and retail price points.
If the same type of tube fails repeatedly in the same location under normal use conditions, the failure is more likely a design or manufacturing quality issue than a handling problem. Common quality-related failure patterns include:
Cosmetic brands experiencing consistent tube failures of these types benefit from working directly with packaging suppliers to review material specifications, mold tolerances, and formula compatibility testing before production runs. The Lip Gloss Tube solutions available at nb-huihe.com include compatibility testing support and custom specification options that address the most common design-related failure modes, ensuring that packaging performs reliably across the intended product lifecycle and formula type.
Fixing a broken lip gloss tube successfully depends on correctly identifying the failure type and applying the appropriate repair technique for that specific problem. To bring everything together:
With the right approach, most broken lip gloss tubes can be returned to functional use in under 30 minutes, saving both the formula inside and the cost of an early replacement. For ongoing tube reliability, consistent cap-cleaning habits and protective storage are the most effective prevention measures available.